It’s more secure than text messages for two-factor authentication.
Here is the promised part two on how to set up two-factor authentication with an authentication app. I originally wrote this in October 2020, but there have been some slight changes to the names of menus so I am updating it.
If you missed part one on finding your one-time-use backup code, check that out first. You should have it on hand because Twitter is removing the option to have the verification codes sent by text message in March 2023 except for people paying for Twitter Blue. The good news is that an authentication app is more secure than using text messages.
(It does seem bizarre that you can pay a monthly membership fee to use a less secure authentication method, but that’s Twitter for you.)
Step 1
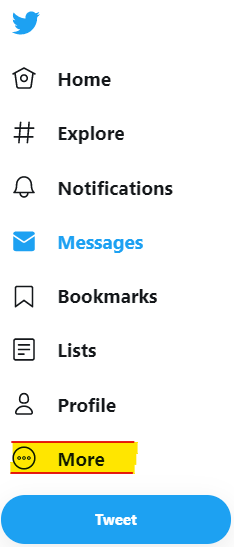
On the PC, choose More from the Main Menu that is on the side of your screen. (I highlighted the option to make it stand out.)
Step 2
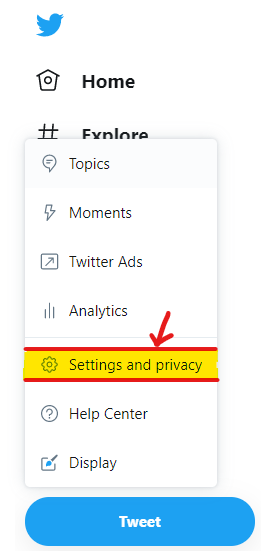
From the menu that popped up when you chose More,
select the “Settings and Support“ option, then
select the “Settings and privacy“ option.
Step 3
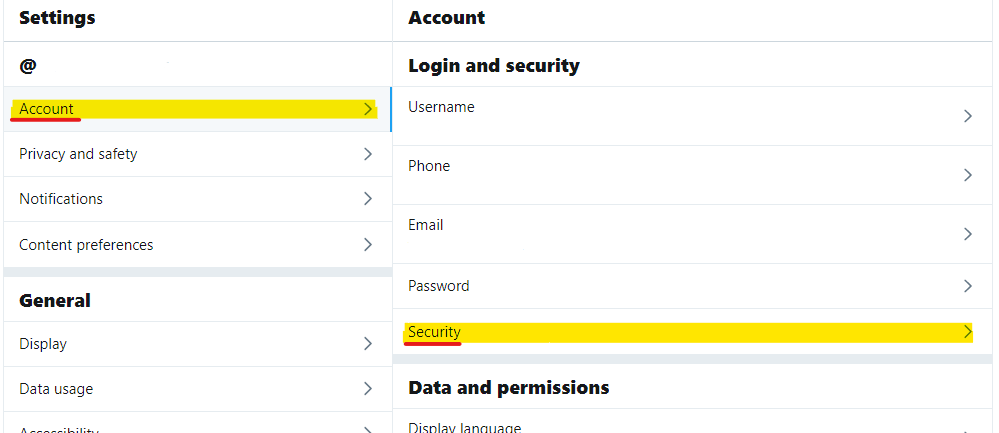
Click “Security and account access” on the left to expand it, then choose “Security” on the right.
Step 5
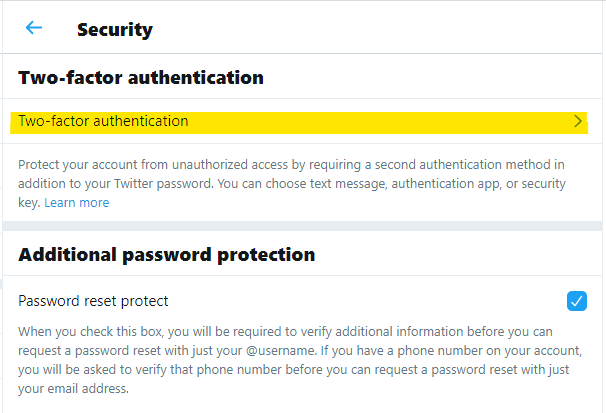
Check the box for “Authentication app” near the top of the “Two-factor authentication” menu.
You’ll need to install an authentication app on your phone before proceeding. I’ve used both Google’s and Microsoft’s for various accounts, but there are also other options that you can find by searching the app store.
NOTE: If you didn’t get your emergency backup authentication code yet, do that first.
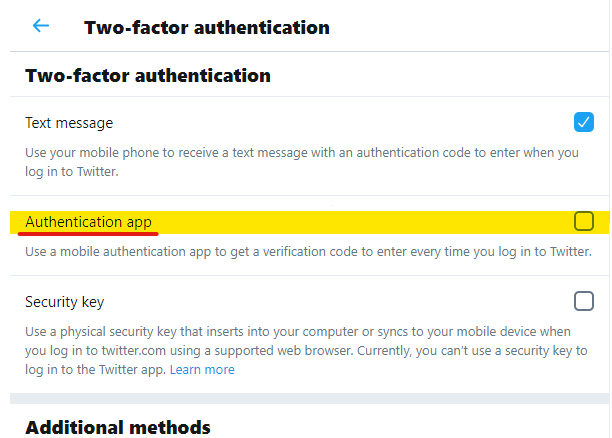
Step 6
This dialog box pops up next. If you have an authentication app on your phone, go ahead and click Start.
If you don’t yet have an app, look over your options in the app store and install one.
Open it and log in (if you choose Google or Microsoft, you can use an existing account to log into the authenticator app.
This is a different login than your Twitter account; it’s just for the app. If you don’t have an account to use with the app, create one. Do not use the same username and password as your Twitter account.
Once you are logged in, for Microsoft, tap the dots in the upper right to get a menu, then choose “Add account”, then “Other account” and the scanner will open for the next steps.
For Google, tap the colorful plus sign in a circle that’s in the lower right corner then tap “Scan a QR code” and you’ll be ready for the next steps.

Step 7
After you’ve clicked Start, you’ll be prompted for your password. If you have it saved in your devices and thus haven’t typed it recently, make sure you remember it before doing this or you might need that backup code sooner than you thought. 🙂
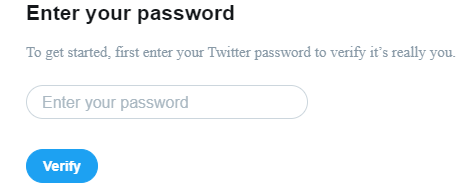
Step 8
This dialog box will pop up with a QR code below the text for scanning with your chosen authenticator app. Because the QR code links to the account, I didn’t think I should do a screen grab of mine. 🙂
It should give you a passcode to enter if you can’t scan, but it’s easiest to do the Twitter end on a PC and scan it with the Authenticator app on your phone.
Important: You scan from within the authenticator app after choosing to add an account, not from a 3rd party QR reader. Open your authenticator app, choose to add an account, and scan the code.

Step 9
After you’ve scanned and your Twitter account has linked to the app, it will want you to enter a code from the authenticator to verify that it is working.
Each code changes after 30 seconds for both Microsoft and Google so if the timer is running down, you may want to wait for a fresh code.
(I haven’t used any other authentication apps, so can’t comment on their settings. I suspect 30 seconds might be industry standard.)
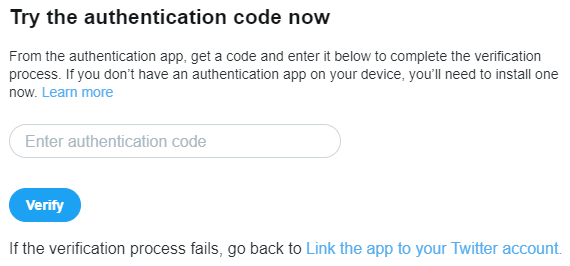
Step 10
After you enter your verification code and hit that Verify button in the last step, this will pop up to verify that everything is connected and works, and to give you a one-time-use backup code that you should write down and keep in a safe spot.
This single use code will be the same as the one you generated earlier. Or, it should be – best to double check it before you close this box!
Again, jot it down in a safe place in case your phone is lost or dies and you need to access your account on a different device.

And you’re done!
Reminder: That backup code can only be used ONCE. If you have to use it to access your account, be sure to immediately go through the steps to generate a new code and jot that one down somewhere safe for the next time.
Image Credits: screenshots are all by Jennifer Yuen, keyboard image is from Stencil and used with permission.


